
Lunar Tracking using the VIEW Intervalometer
Photographing the Lunar Eclipse? The VIEW can automatically follow the moon with compatible motion systems. Read more for tips on setting this up. Remember it's very important to test the whole setup beforehand!
Lots of progress has been made on the VIEW's firmware lately, and while tracking has been working well for some time now, the overall experience should be much better on the latest beta version. At the time of writing, the recommended version is v1.8-beta42. This version is required for use with the Genie Minis, but v1.7.8 should also work with the NMX (but the latest is still preferred for better ramping and live updates via the app). IMPORTANT: known bug -- if using sun/moon tracking, the "Track Below Horizon = 'no'" option does not work correctly on the pan axis on versions prior to v1.8-beta42, as it causes it to ease back to the start. Make sure to set 'Track Below Horizon?' to 'Yes' for the Pan axis or update to beta42.
To update the the latest beta version, either use the SD card method (http://docs.view.tl/#update-via-sd-card) using this zip file or enable Settings->Developer Mode and update via wifi (http://docs.view.tl/#update-via-wifi)
SETTING UP THE EQUIPMENT
For tracking the moon, you can either use a pair of Genie Minis, the Dynamic Perception Sapphire or pair of Stage-Rs with the NMX. Also, it's possible to use just a single axis like a Stage-R or Genie Mini and just follow the moon panning. Or, you can polar align a single axis and set it to constant motion at about 15°/hour, but I won't be covering that here. See this prior post for more on alternate options and calculations: https://www.timelapseplus.com/blog/2018/1/30/total-lunar-eclipse-time-lapse-planning
For moon or sun tracking with the VIEW, it's very important that the pan axis is level and the tilt axis is perpendicular. Any error in level will add error to the tracking. Obviously accuracy becomes more important with telephoto lenses.
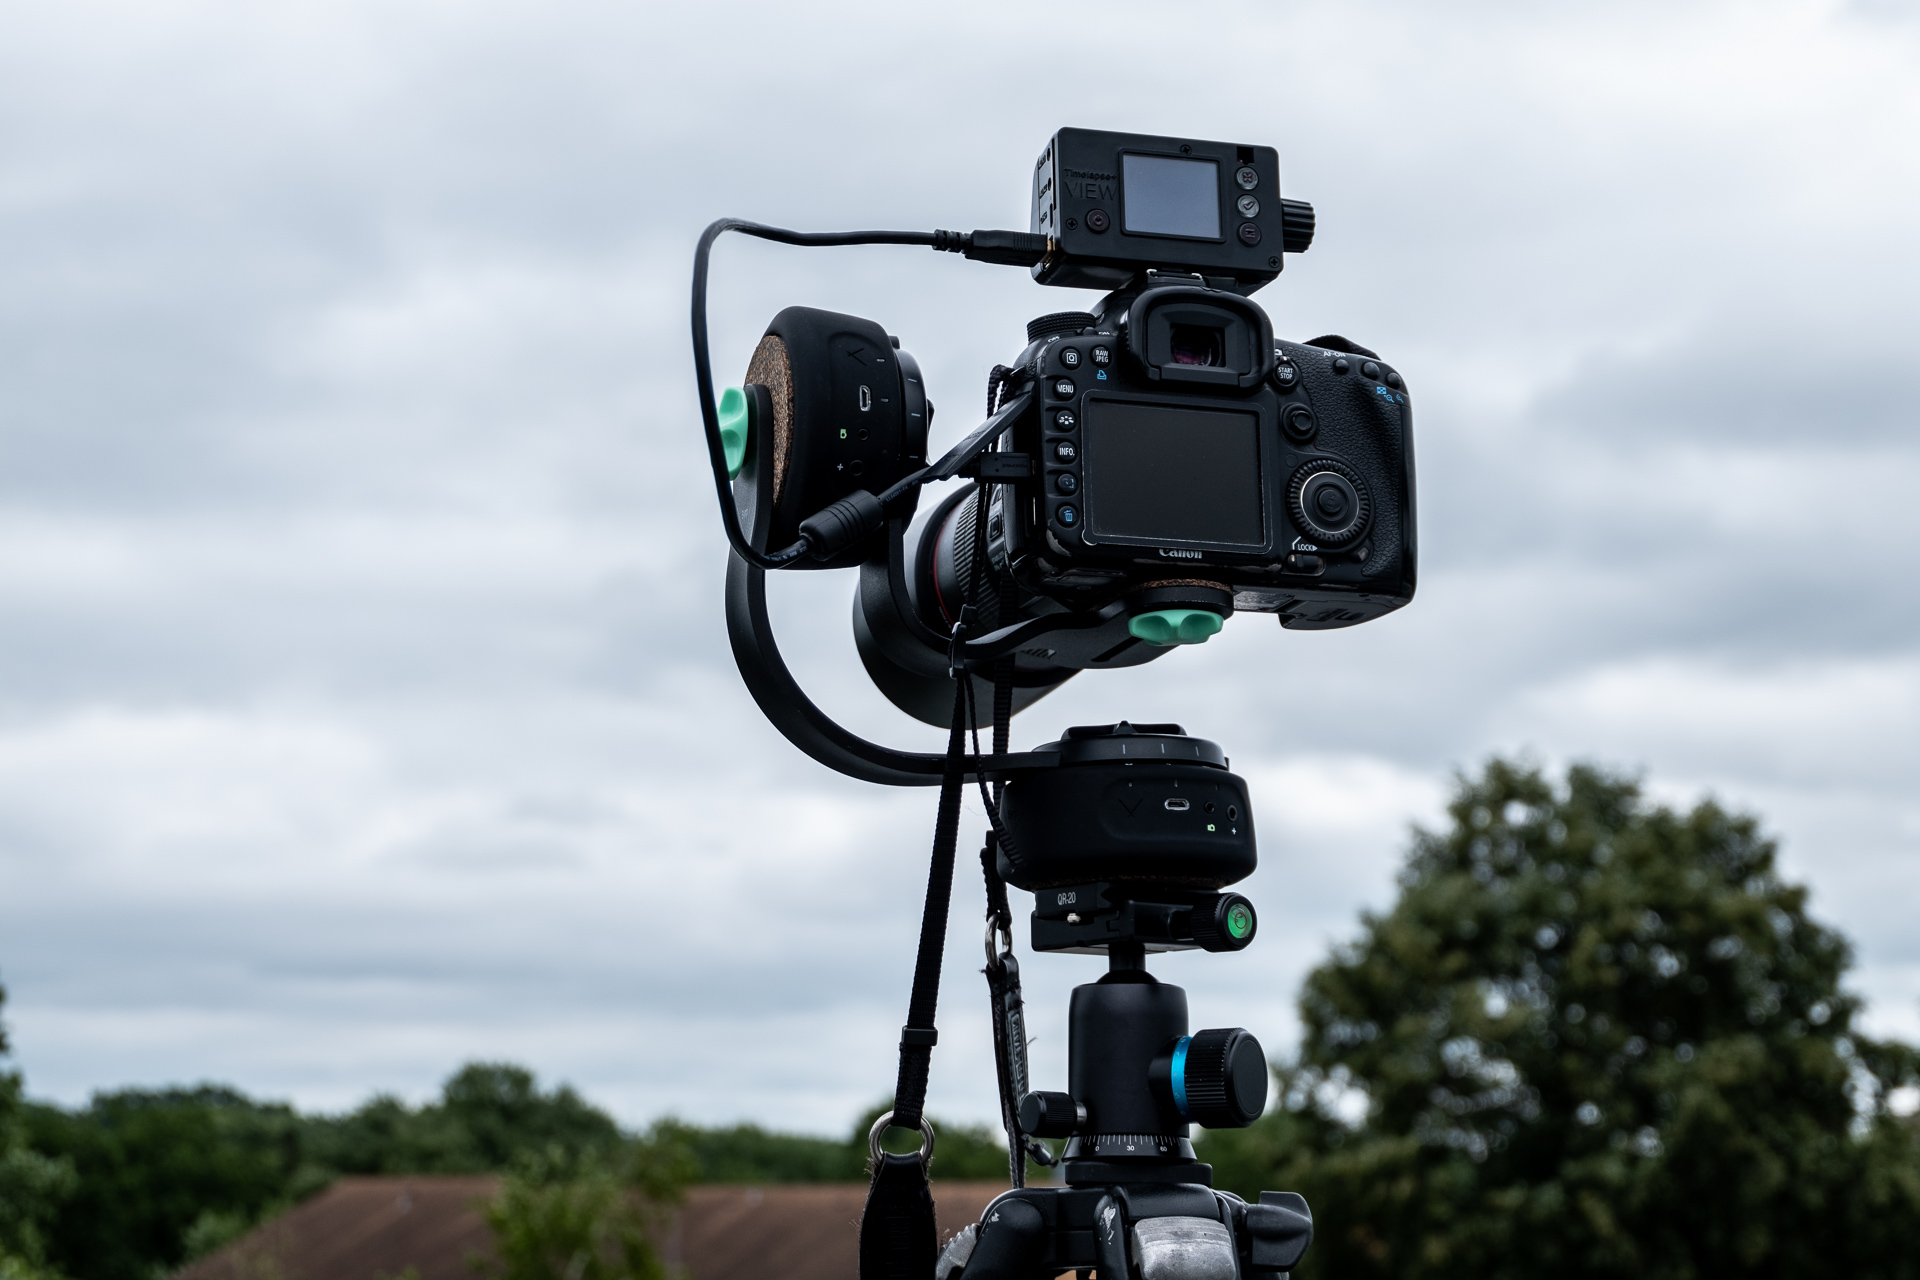
If you're using the Genie Minis, make sure the camera and lens setup is well balanced.
SETTING UP LOCATION DATA ON THE VIEW
We need to make sure that the VIEW has location data available. If you have a GPS version, make sure the GPS is enabled in Settings->GPS Module. Then make sure it has a location fix. You can verify this in Settings->GPS Info as well as confirm it shows the location icon in the top part of the screen. If the VIEW has trouble getting a GPS fix, try disabling wifi (Settings->Wireless Setup->Disable Wifi) while it first establishes a position.
If you don't have a GPS version, set the UTC date and time in Settings->Set UTC Date and Settings->Set UTC Time. The current time in UTC can be seen here: https://time.is/UTC
Then set the coordinates for your location in Settings->Set Latitude and Settings->Set Longitude. The coordinates are entered in degrees with a fractional component, e.g., 44.12345 (not degrees, minutes seconds). Don't forget to use a "-" at the start if needed as well. The "DD (decimal degrees)" section of https://gps-coordinates.org/my-location.php has the numbers you need.
Even if you have a GPS version, you can manually enter coordinates by disabling Settings->GPS Module if preferred, but this shouldn't be necessary.
CONNECTING THE MOTION SYSTEM TO THE VIEW
Once the motion equipment is setup, the next step is to get it connected to the VIEW. If you're using an NMX, a USB connection is recommended (https://vimeo.com/272647986) but Bluetooth will also work (https://vimeo.com/272651869).
With the Genie Minis, Bluetooth is the only option and works very well. Start by enabling Bluetooth on the VIEW (Settings->Wireless Setup->Enable Bluetooth). Note that if in the Wireless Setup menu there's only a "Disable Bluetooth" option it means Bluetooth is already enabled and you don't have to do anything. Power on both Genie Minis and wait for the flashing lights to become solid. You'll also see a Bluetooth icon appear in the top bar of the VIEW once they're connected. It may take up to a minute for both to connect. With the Genie Minis, no cables are attached to them (unless you want to have them charging). Here's an example of a single Genie Mini getting connected to the VIEW: https://vimeo.com/235979676SETTING UP THE TIME-LAPSE
If you're using the VIEW stand-alone, it's quite simple -- you'll find a "Tracking" option in the Timelapse menu. Just set it to "Follow Moon". If you're using the Genie Minis, that's all you need to do -- it will detect the orientation of each axis automatically. If you're using an NMX, you'll see two more options where you select which motor is connected to each axis (Pan Motor, Tilt Motor). The motor options look like NMX1, where it would be the motor connected to the #1 position on the NMX. There will also be NMX1r, which is the same motor, but reversed direction.
If you're using the app, you'll see each axis listed in the Intervalometer screen. Here you can select each axis's function. Set them to "Tracking" and then below set the Tracking Target to 'Follow Moon'.
While the time-lapse is running, you can use the app to make adjustments to the tracking if needed (via the "Motion/Focus" section of the Intervalometer screen).